Operating
Guide 2005
The Gun Finder has been written specifically to meet the needs of the smaller Firearms Dealer or Gun Shop where the cost of The Gun Register cannot be justified or where there exists a need for rapid retrieval of firearms information.
Imagine your Firearms Officer calls and wants to know the status of a particular firearm, using The Gun Finder you can find the item in a few seconds, even if you do not know the serial number, by drilling down through the various searches you can either find it or narrow it down to a minimum selection.
This guide assumes that you have installed the program and have the main Gun Finder screen on display as shown below.
So how does it work, we are also assuming at this stage that you are using the unregistered version of The Gun Finder that you have downloaded from the Internet. Until you register it you are limited to searching the sample data of which there are a large number of entries.
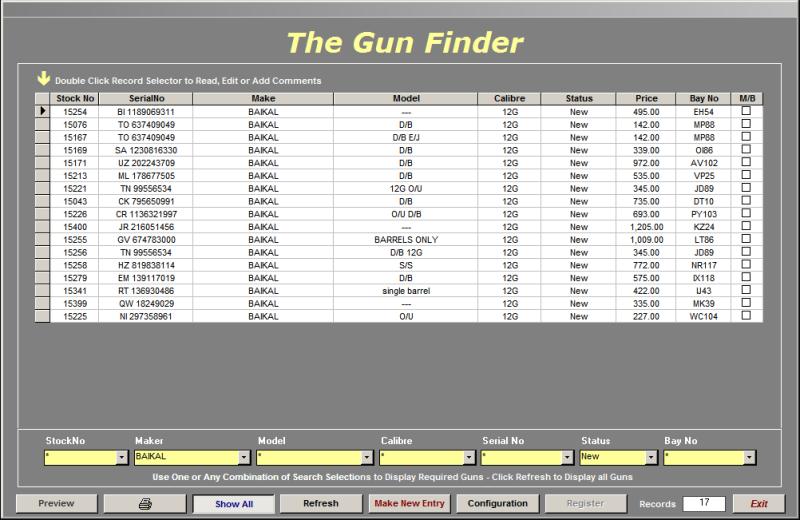
Before you press any buttons the data area of the screen will be blank, clicking Show All will display all the guns in the database sorted by Stock No. At any time when there is data being displayed the Sort Order may be changed by simply right Clicking on the Title Bar of the Column that you wish to search by.
You can limit your searches by any one of the yellow Drop Down boxes as per the screenshot above, as you can see we are limiting the search to BAIKAL guns by Maker and New Guns by Status.
Selected searches can made on any one or more of the following criteria:
Stock
No
Maker
Model
Calibre
Serial Number
Selling Price
Rack
or Bay No
The Show button toggles On and Off when it is depressed it causes the screen to display the selected search data based on the selected Drop Down list or lists.
The Refresh button releases the search boxes and replaces any selections with Asterisks.
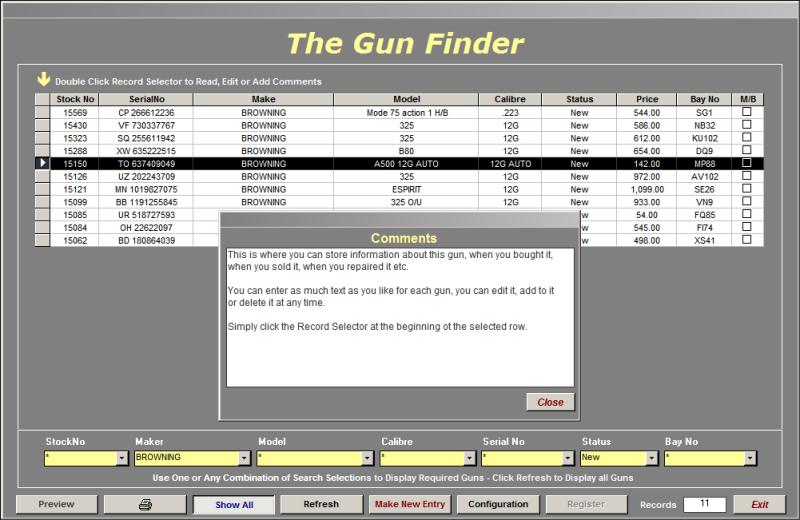
The Preview button causes a Report to be displayed based on the selected data as shown below, the Report may be printed by clicking the Print Button.

You will see that one of the records in the Report is also displaying some text. This text may be entered by double clicking the Record Selector at the start of a selected line on the main Gun Finder form as shown below, the effectively enables you to build up a history of any selected gun. Notes may be Entered, Edited or Deleted at any time.
In order to take advantage of the other features of The Gun Finder you will need to register it, to do this you will need to obtain a Registration No from Practical Software. Once you have obtained it you need to enter it in the Configuration screen, the Registration No. is based on the Company Name that you enter in the Company Name field. Once the correct Registration No. and Company Name have been entered you will have successfully registered the program.
You will now be able to enter New records, to do this click the Make New Entry button.

When you add a gun to the stock list
The Gun
Finder will automatically assign a unique sequential Stock No, this
avoids any problems with duplicate Serial Nos. The Stock No
field is automatically assigned which is why it is greyed out.
You may add a pre-defined prefix to the Stock No in order to further
identify it, simply select one from the Drop Down box.
The Make, Model and Calibre can then be selected and entered.
The Serial No can then be entered.
The Bay or Rack No can be entered if required.
The Gun Status is selected from the pre-defined Drop Down box.
The Selling Price may now be entered if required.
The Cost Price may now be entered if required.
The Date Acquired can then be entered, in order to ensure
accuracy we recommend that you double-click the Date Acquired field and
select it from the pop-up calendar.
Comments may be entered in the white box, these notes may be
accessed for appending or editing later by double clicking the Record
Selector as described earlier.

The Configuration Screen
displays your Company Details, the only compulsory fields are the
Company Name, Password and Reg. No.
The Registration Number is derived from your Company Name
therefore the name you enter must be an exact match to the name you give
us upon registration, it is also case sensitive.
Once your program is registered there will only be one asterisk in the Reg. No. field as illustrated above.
This screen also gives you access to the raw data via the Data Tables button.
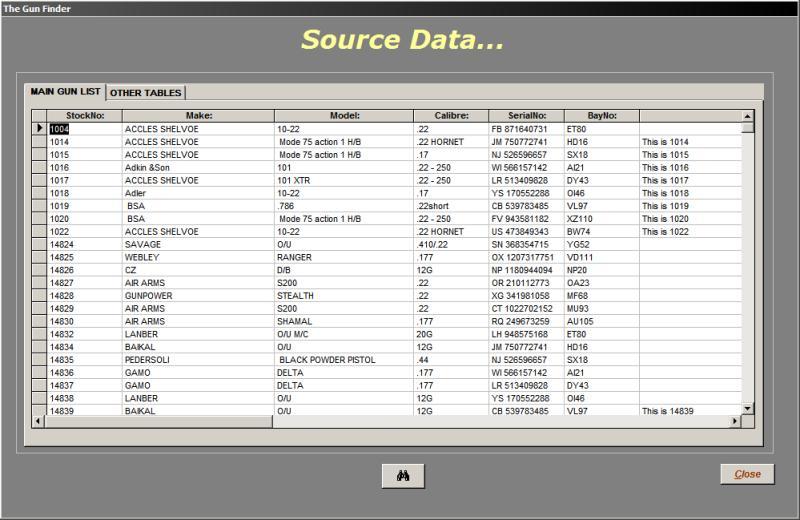
Data shown above is not identifiable by Serial Number
Source Data tables
may be accessed via the Configuration screen and Password,
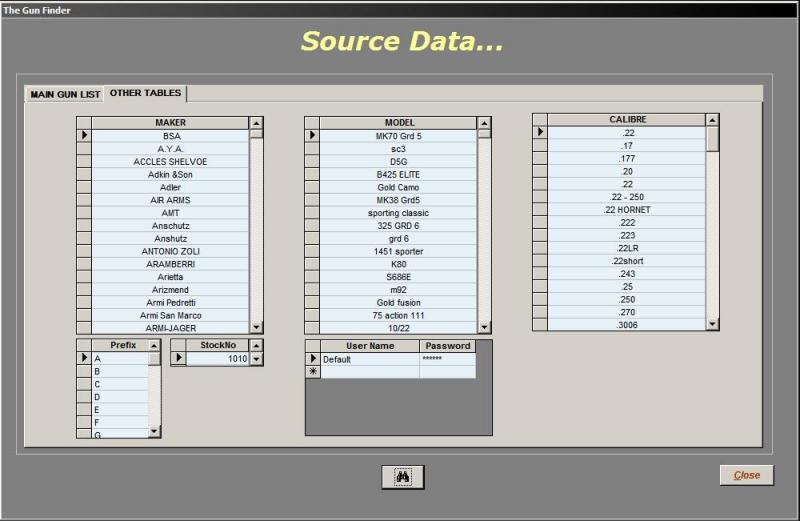
here records may be deleted in bulk or edited to suit, you may wish to
edit the Makers names or add new ones, similarly with the other
tables. When starting from scratch you will probably wish to reset the
Stock No field to a starting number of your choice, similarly
with the Prefix table you may prefer to use more meaningful
Prefixes, of course you do not need to use Prefixes at all.
Whilst you are in the Source Data screen you may search for any field in
any table simply by clicking the Binoculars icon, and entering your
search criteria or clue, for example if you are looking at the Main Gun
List table you could search for Guns in a particular Bay or perhaps for
a specific Serial or Stock No.
Searches using the Binocular tool may be restricted to by the choices
you make in the Find box that appears when you click the
Binoculars. Searching by this method is no substitute for the main
Gun Finder Screen but it can be useful, this screen is primarily
intended for use when you wish to edit the fixed data.
User Names and Passwords can also be entered
here to ensure that only authorised users can access the
program.
Contact Practical Software on:
Free Phone 0800 0196402
Mobile: 07090
800190